One of the most frustrating things that can happen when you are cycling is getting a flat tire. Maybe you hit a bump on the road and punctured the tires, or you have had them for a while, so it is time for an upgrade. Whatever the reason behind replacing bicycle tires, we are here to help. With our easy step-by-step guide, you will learn how to change a bike tire in just a few minutes. Next time you get a flat tire, you will be able to handle it quickly and get back on the road in no time.
Bike Tire Removal Tools
Even if it has never happened to you before, you need to think ahead and be prepared to replace a bike tire. The most helpful thing, in this case, is having a well-chosen group of tools in hand.
Although you might not be able to have them with you at all times, you should ensure that you have some basic devices at home so you can deal with easy technical issues by yourself. The below-mentioned tools will not only help you remove and replace a tire, but they are also a great investment for bike maintenance. Next time you want to check if your brakes are adjusted correctly or keep your tires inflated- you will already have all the tools you need.
Repair stand
A bike repair stand is a tool that enables you to easily lift your bike off the ground and adjust it to a height where you can freely work with the tires.
Generally, you can get either one of the two main stand styles. One of the styles uses a clamping mechanism to help secure the bike. You can attach the stand to any tube in the bicycle and adjust its height. Or, the other style, usually referred to as the race stand, secures your bike by the bottom bracket and the front or rear dropout. Another choice you can make is between portable and permanent bike repair stands, where you have basic models for casual cyclists or more advanced versions for the pros.
Tire levers
Tire levers are tools used for getting tires off a wheel. They are usually made out of hard plastic. However, there are also steel levers for more difficult-to-remove tires. Tire levers are like typical levers that we use for moving furniture, except these are smaller. They include a curved end that you can slip under the lip of the tire and sometimes a small hook on the other end that you secure to your bikes’ spokes. You can find tire levers in sets of two or three. You will generally only need two since a third lever is necessary only for the tightest tires.
Patch Kit
Patch kits are a great alternative to replacing tubes when the puncture is manageable. Most patch kids come with patches, glue, and a tool for sanding or scuffing. Additionally, sometimes they also include a pump, a marker, and a tub of water that you can use to find leaks.
Air pump
An air pump is a standard tool that everyone needs in their home. There are a variety of pumps to choose from for your bike:
- Stand (track or floor) pumps
- Hand pumps (mini-pumps)
- Stand pumps
- CO2 inflators
- Electric pumps
Your tires must have the proper air pressure, as it helps reduce the possibility of getting a puncture.
Wrench
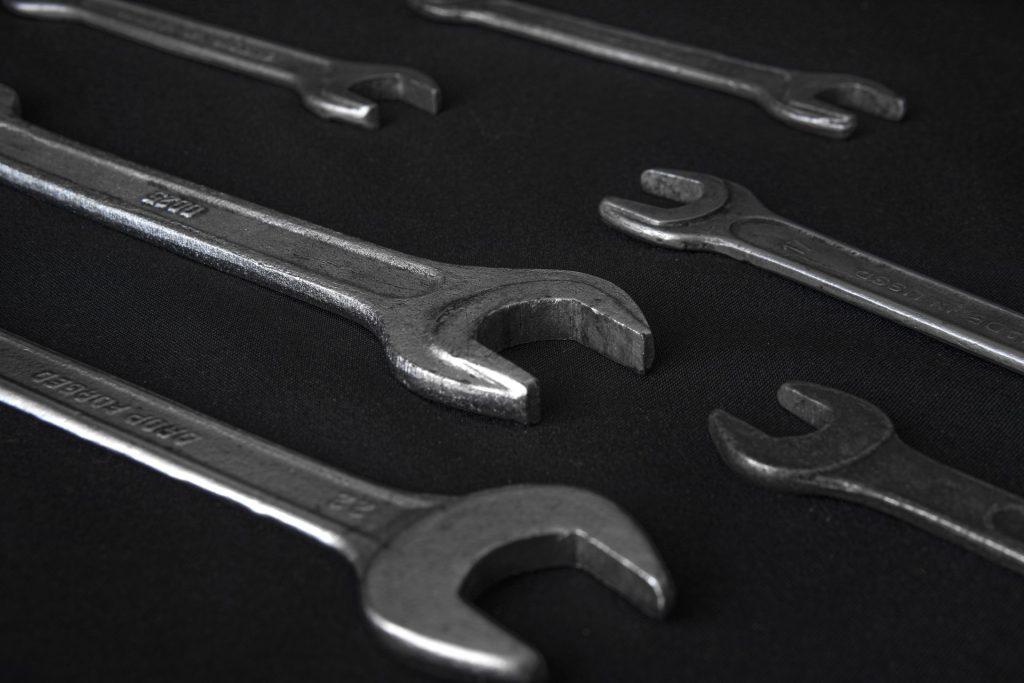
Wrenches are tools used for tightening and loosening various nuts and bolts in the bike. From the several types of wrenches, good choices for most bikes are torque wrenches and Allen wrenches.
How to Change a Bike Tire: Step by Step
Changing your bicycle tire is a simple task that you will quickly master. This guide will help you save time and money from the frequent visits to mechanics for something you can do yourself in a few steps.
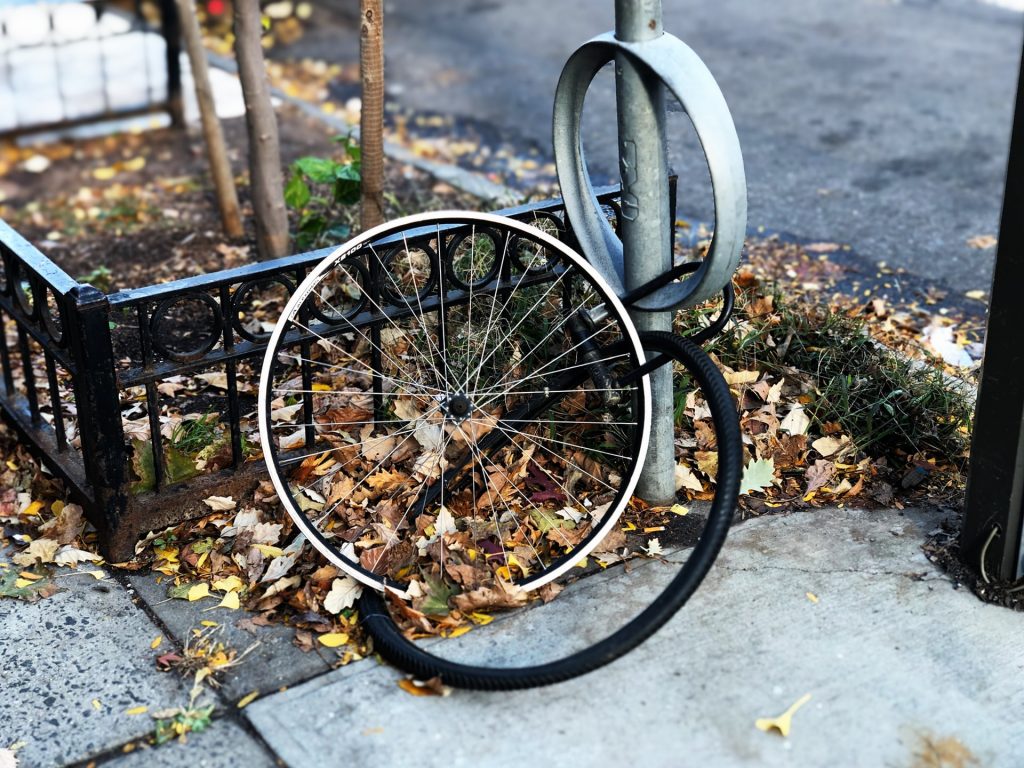
First, remove the wheel
The first step is to use your repair stand and lift your bicycle to your preference. If you do not have a repair stand, you can put the bike on its side or turn it upside down. However, have in mind that this can damage your handlebars and saddle. Then, use a quick-release lever or a wrench to release the nuts and bolts. Ensure the brake cables are detached and proceed to lift the wheel off the bike frame.
Detach the tire and the tube from the rim
Using a tire lever , hook it under the tire and separate it from the rims. Then, using a second lever and your fingers, slide the tube out from inside the tire as well.
Inspect the inner tube
To inspect the inner tube, start by removing it from the tire, either by deflating the tire completely or by removing the valve stem if it has one. Then, visually inspect the inner tube for any signs of damage, such as cuts, punctures, or abrasions. If you find any damage, the inner tube will need to be replaced. If there is no visible damage, use your hands to feel for any leaks or weak spots, which can be indicated by a hissing sound or a noticeable decrease in air pressure. Once you have completed the inspection, you can reinflate the inner tube and reinsert it into the tire, or replace it with a new one if necessary. Regular inspections of your inner tube can help you to avoid unexpected punctures or leaks while riding, ensuring a smooth and safe experience on your bike.
Inspect the rim
To inspect the rim, start by removing the wheel from the bike frame and examining it closely for any signs of damage, such as dents, cracks, or deformities. Pay special attention to the spoke nipples, as they can sometimes become loose and cause damage to the rim over time. If you notice any damage, it is important to have the rim repaired or replaced as soon as possible, as a damaged rim can cause the tire to lose air pressure, leading to an unexpected flat. However, if you don’t notice anything major, then you can continue using the same ones.
Repair the inner tube
Repairing an inner tube is a quick and easy process that can be done with a few basic tools. To repair an inner tube, you will need a bicycle pump, a patch kit, and a metal rasp. First, locate the hole or puncture in the inner tube and mark it with a pen. Then, use the metal rasp to rough up the area around the hole, creating a surface to that the patch can adhere. Next, remove the backing from the patch and apply it to the inner tube, making sure it covers the hole completely. Finally, inflate the inner tube slightly, to ensure that the patch has adhered properly, then reinflate it to the recommended pressure. When done correctly, a well-executed inner tube repair can be a cost-effective alternative to replacing the inner tube and can get you back on the road quickly.
Install the tire and tube
Now that your tire and tube are ready, you can work them back onto the wheel. Make sure that the inner tube is completely under the tire. Use your finger to maneuver it until it falls into place. Then, you can proceed to once again use your air pump and inflate the tire to your preferred pressure level.
Lastly, install the wheel
Last but not least, slide the whole wheel back onto the bike frame. Use a wrench to tighten the nuts and bolts, and you are good to go.
Knowing how to take a tire off a bike, patch it up, or replace it are life skills that will come in handy one day. Follow each of the previous steps carefully, and you will have no problem maintaining your bike’s tires again.


