It’s obvious that scrubbing your bike clean isn’t as much fun as actually riding it. But there is a relaxing effect and a feeling of satisfaction about seeing a well-washed, sparkling-clean bike. Although, it’s not just keeping it nice and shiny. From a practical viewpoint, a bike rides smoother, doesn’t wear out prematurely, and saves you money long-term if it’s properly and regularly cleaned.
If you’ve been naughty hitting wet and dirty roads recently, it’s probably about time to provide some extra care to your bike and treat it to a thorough wash. When exposed to grime, dust, and mud, parts of the bike begin to wear down and corrode, and you will struggle with seized gears and squeaky brakes.
While it may be tempting to just cast it off until your next ride, cleaning your bike at least once a month improves your riding experience and prevents further issues.
If you need guidance on how to clean your bike, below you will find tips and tricks as well as the tools you need to make the process of cleaning your bike less of a hassle.
Bike Cleaning Kit
It is recommended to clean your bike once in a while to ensure that it rides at its absolute best and has a long and happy life. While your local bike shop has all the knowledge and equipment necessary for all your maintenance needs, there are a few easy-do-it-yourself things that you can do to restore your bike to pristine condition and in full working order.
But how should you go about it? It may seem a pretty straightforward task, but there is also a chance to do more harm than good. As any decent worker would tell you, to do a good job you need to have the right tools. So, here’s our take on the tools you need to give your bike a nice sleek look.
Water source
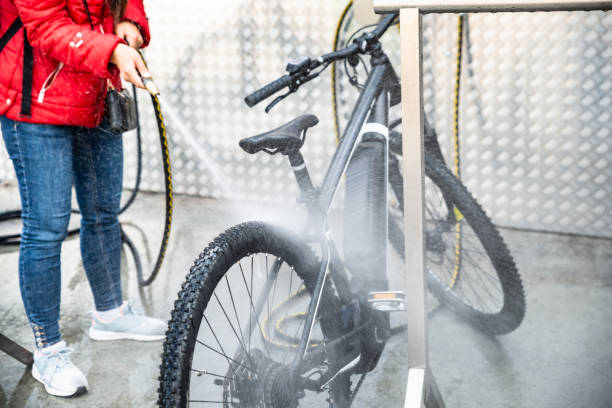
Water can be quite handy, but be careful not to use a high-pressure hose since it can damage your bike’s sensitive gear. It’s also preferred to use a two-bucket method—one for clean soapy water and the other for rinsing out the sponge. This way, you will prevent the dirt and grime from spreading back on the bike.
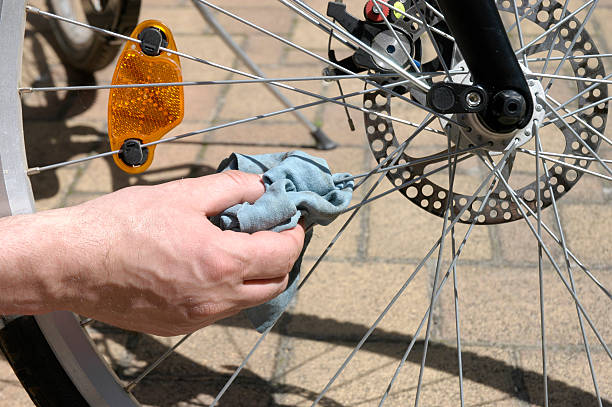
Clean Rags
Keep plenty of these in your hand. Clean rags can be used to wipe down the frame, wheels, and components of a bike, and can also be used to dry the bike after washing. It’s a good idea to have multiple clean rags on hand, as they can become soiled quickly and may need to be swapped out during the cleaning process. By including clean rags in a bike cleaning kit, riders can keep their bikes looking and functioning like new with ease. If you can’t find any rags, old T-shirts and even socks will do just fine.
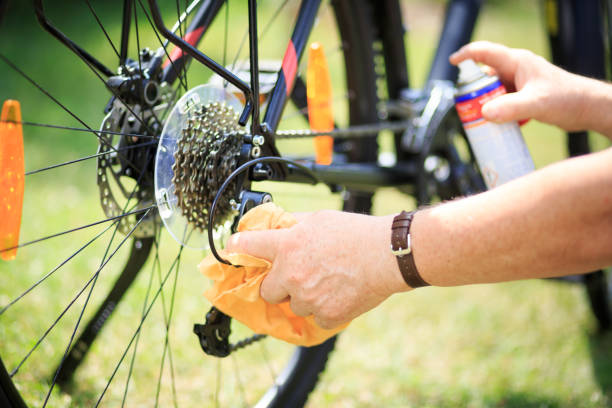
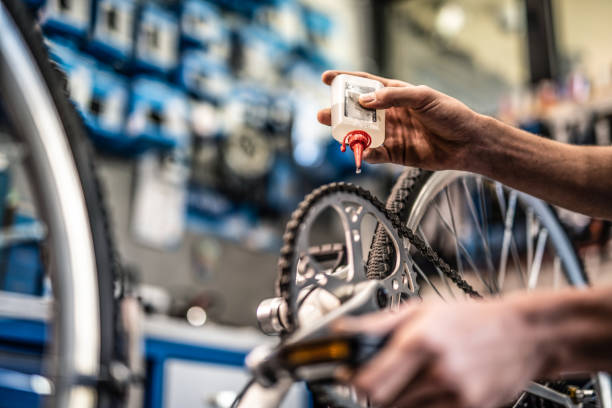
Chain cleaner (optional)
A chain cleaner is an important tool for keeping a bike’s drivetrain in top condition and is an essential part of a bike cleaning kit. A chain cleaner is a small container that is filled with a specialized cleaning solution and attached to the chain. The rider then turns the pedals, causing the chain to run through the cleaner and removing dirt and grime from the links and rollers. After cleaning, the chain should be thoroughly rinsed with water and then dried before being lubricated to prevent rust and wear. Although you can use rags to clean the chain, a chain cleaner will definitely do a better job with high efficiency and minimal effort.
Brushes and a sponge
It’s preferred to have them in various sizes and shapes, so it’s easier to reach places where it’s difficult to remove grime and dust. Some brands offer specific brushes for bikes, but an old toothbrush that you’re not using anymore works just fine.
Degreaser
A degreaser is needed for cleaning gummy parts of the bike, such as the chain, chainrings, and cassettes. Make sure not to use hardcore industrial degreasers, though, as you risk getting chemical burns and potentially damaging the chainrings. It’s important to know how to handle these chemicals and dispose of all solvents properly.
Lubrication
After your bike is all cleaned and dry, it’s important to apply lubrication. Lubrification is crucial for protecting the bike from excessive wear and preventing it from freezing up. However, you should be careful not to over-lubricate your chain and other components since it can cause poor performance and attracts dirt more easily.
Bike stand (optional)
Not necessary, but nice to have. A work stand will give you a comfortable height, making it so much easier and faster to maneuver while also saving you from a backache. If you keep your bike in a corner inside your house, you ought to place it in stable stone floor tiles so the wheels do not hit something potentially hazardous that could force them to break, and so that you can have an easier time cleaning it and taking it out when you need it.
The tools listed above are a good way to clean your bike nicely without spending too much money and time. However, if you want to exert a solid effort by cleaning your bike more regularly, you’d better be prepared to fork over the dough for it and invest in bike-specific cleaning products. You can make do with other product substitutes, but having specific washing products will save you a lot of time, and they work a lot better.
The Cleaning Process
The best way to clean your bike always begins with reassuring you that you have everything you need to get the job done. Prepare the bike cleaners listed above and follow the steps below to give your bike a proper cleaning.
Step 1: Rinse your bike thoroughly
If your bike has accumulated a lot of dirt and mud, begin by using a garden hose to wet the entire bike upside down. You don’t need a powerful stream of water to knock the dirt off as it can get past your bearing and suspension seals and damage them. It’s fine as long as you don’t blast high pressure into the bike’s sensitive areas. The goal here is to loosen as much dirt as possible before you start scrubbing at anything.
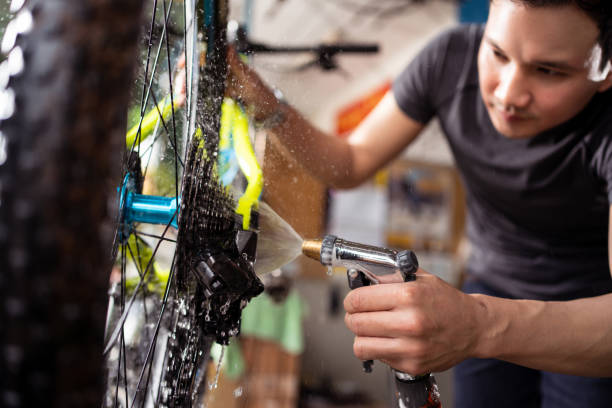
Step 2: Clean the drivetrain
While the bike is still soaked, liberally apply degreaser into the cassette, chainrings, and both front and rear derailleur. After letting the degreaser work its magic, give it a good scrub with a stiff brush to get into the nuts and bolts of those tight spots where grease and grime prove to be troublesome. Scrub and rinse until you see your drivetrain is as clean as you can make it.
Step 3: Clean the frame and wheels
Use the second fresh bucket of soapy water we talked about earlier and get your sponge wet. Scrub up and down all the frame parts until it is completely soaked. Use the toothbrush to reach spots that the sponge can’t. Once everything is dirt-free, use a dry rag to dry the frame.
Don’t miss the wheels and brake pads, though. Tires don’t need to be cleaned as they will get dirty as soon as you start riding. Focus more on the brake pads and rims as they attract more dirt and get in the way of your brakes. Take a soft brush or a sponge and scrub your rims until it is grease-free, then use a dry cloth to remove any air bubbles.
Step 4: Dry and re-lube
Once you’ve treated the whole bike, let it sit out in the sun and open air until it’s completely dried out. If you need to get going or have zero patience, you can use a dry towel or a microfiber cloth to pat it dry. An air compressor is the dream tool for this, but drying it manually works just fine.
With your bike clean and dry, there’s hardly any lubrification left. A common mistake after cleaning the bike is forgetting to re-lube. Turn the pedal backward and drip the lube into moving parts. Let it sit for a while and clean any lube excess. Re-lubing your bike after it has been cleaned and dried is of paramount importance to avoid corrosion and keep things running smoothly.
Step 5: Get it dirty again
Properly cleaned and lubricated, your bike works a treat now. The only thing left to do is hop on your bike and get it dirty again. I mean, what’s the point in scrubbing and cleaning if you weren’t going to ride and get it dirty again?
A clean bike doesn’t just look more attractive; keeping your bike clean will help it run smoother and ensure a happy and long life. While cleaning it daily wouldn’t be necessary, we recommend a regular maintenance schedule through these simple and easy steps.


