The bike chain is the second most consumable part of your drivetrain. If you put a lot of miles on your bike, the chain will stretch and wear, so you will have to replace it sooner or later, but it is much better to do it sooner before it causes havoc.
But, how do you know when the time to replace it has come? What tools do you need to replace it, and how to do it in a fast and easy way? In this article, we will answer all of these questions and more.
When Your Bike Needs Chain Repair?
It doesn’t matter how well you look after your bike and its chain; the day when it is ready to be replaced will inevitably come. It is a good idea to invest in a chain checker to accurately know when your bike chain is ready to be recycled. Understanding when this time has come is essential because it will prevent a worn chain from damaging other components in your drivetrain and thus avoid poor shifting and slipping that comes with having a poor bike chain.
As your chain wears, every link’s internal bushings eventually lengthen. As a result, the chain puts more pressure on the cassette cogs and chainring teeth, which causes them to age faster, worsening the shifting quality.
The 2,000 miles rule
If you don’t have a chain checker, a good rule of thumb is to replace your bike’s chain every 2,000 miles. Mind you, no two riders treat their bike chain the same, and as a result, no two chains will wear at precisely the same time. Therefore, it is best to use a chain wear measuring tool to determine the condition of your bike chain.
So, in case you have a chain wear measuring tool, use it to apply pressure to the pedal so the top of the chain is taut. After that, place the device on the chain and see the results; the indicators will show if it is time to replace your bike chain.
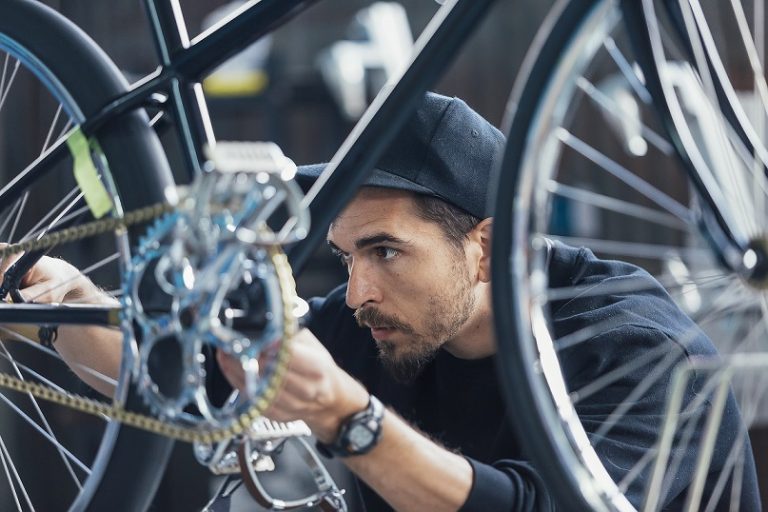
Bike Chain Parts And Tools
If it is time to change your bike chain, first you need to gather the tools you need.
First, you will need the chain wear tool which hooks over one pin (also known as a roller) in your bike chain, and the other end inserts in the opening between two pins. Now, look at the numbers on the tool to know how old your chain is and whether it is time to replace it.
Then, you need a new chain, obviously. Buy your new chain based on the speed of your bike. For instance, if you have a 9-speed bike, you should get a 9-speed chain too. If you want, you can invest in higher-end chains with special features such as coatings that delay corrosion or are made from stainless steel.
You cannot start the chain replacement procedure without a replacement pin or else called the master link. New bike chains typically come with a new pin or a specialized link called a master link, which connects the two sides of the chain together. But, if you are not replacing but rather repairing your chain, buy replacement pins or master links separately. Keep in mind that they should be compatible with your chain speed and brand.
You also need a chain tool that should be compatible with your chain links to remove an old pin and insert a new one easily when you break and reconnect the chain.
In the end, you need master link pliers. If your chain connects with a master link, you will find those master link pliers will make the process of disconnecting and reconnecting the master link much more effortless.
How to Replace Bike Chain in 5 Steps?
 After you’ve got the necessary bike chain parts and tools, it is time to replace it. Follow these five simple steps to replace your bike chain in a fast and easy way. Let’s get started!
Remove the bike chain
To remove the chain from your bike, you will need to disconnect it (break the chain). The first step is to shift your chain to the smallest chainring and smallest cog, but it would be even better if you remove tension from the chain; you can do that by removing the chain from the front chainring or even taking the rear wheel off the bike.
If the bike has a standard chain without a master link, place the chain in the chain tool, and align the pin of the chain tool with the pin in the chain, then turn the handle of the chain tool until you push the pin out far enough to break the chain.
But, if the bike has a chain with a master link, you will first need to find it. So, look for a link that looks different when you look at it from the side; break the chain there. Using master link pliers, squeeze the master link pins toward each other; this will allow you to pop the link open.
Clean chainrings and cassette
Now let’s talk a bit about the cleaning process. Firstly, it can be dirty and messy, so don’t wear your good clothes while doing this. It would be best to wear glasses and gloves while you do this so that your eyes and hands are protected.
Cleaning the chain rings is a relatively simple process, but it is an important one. You should clean your chainrings regularly because they collect dirt and debris, which causes a grime build-up. If you don’t clean your chainrings, all that build-up will wear the chain more quickly.
It is much better to clean the chainrings now that you dropped the chain off, but make sure you didn’t mix up or lose the small parts.
Start by applying a generous amount of soap or degreaser to a scrubber or cloth and begin scrubbing the whole chainring. Pull the scrubber or cloth back and forth to clean the inside of your chainrings too. Scrub away until all the dirt and mud disperses.
Next, it is time to clean the cassette. Take a brush, scrubber, or an old cloth and apply plenty of detergent or cleaning agent to it. Then, start scrubbing the cogs and make sure you remove all the dirt and dust. After you’re done, don’t forget to wash it all off with clean water.
Define chain length
If your old chain was an appropriate length, you can use it to size your new chain—first, line up the ends with outer or inner plates. Insert the master link so you can get a good side-by-side comparison. Next, line up the chains, matching them rivet by rivet. But, keep in mind that old chains may lengthen as they age. Once they are lined up side-by-side, cut the new chain to match the length of your original chain.
If your chain was not an acceptable length, there are other ways you can define the chain length. The first thing you should do is verify that the chain is the correct length. Then shift your bike into the largest chainring and rear cog. The chain needs to be long enough to make the shift with two slight bends at each rear derailleur pulley.
Fit the new bike chain
Then, shift down to the smallest chainring and sprocket; there shouldn’t be any slack in the chain. The derailleur should not pull that far back that the chain contacts itself either. Thread the chain through the front derailleur cage. After that, take off the rear wheel to remove the tension from the chain. Look for a master link; use a master link plier to disconnect the link if you find it. You can also use a chain tool and just cut the chain. After that, pull it across and loop it over the rear cassette, rounding the upper jockey wheel on the derailleur.
Carefully thread the chain through the cage, keeping inside the divider between the plates and around the lower wheel.
Use pins to fix the new chain
After you have cut the chain, grab the chain tool and drop the link you work on in between the jaws of the chain tool. Make sure that everything is aligned well, and then turn the handle until the pin starts to push the center of the link.
Push the pin back in
Look for the pointy end of the joining pin, take both ends of the chain, and join them together. Next, insert the pin into the chain to hold it together; it should fit in place without you needing to hold it. Grab the chain tool once again and unscrew the handle a few turns. Slot the link with the pin into the chain tool and screw the handle down to push the back in; work carefully as the pin becomes precisely flush with the outside of the plate. Once it’s there, you can remove the chain tool.
Check the link
You’re almost done! Now check the link to make sure it moves freely. If it doesn’t, reattach the tool and give it a slight push. If it seems to be in the correct position, flex the chain to free it up.
Next, snap the end off the back of the pin by giving it a good twist using pliers or even the back of the chain tool.
The Bottom Line
Replacing your bike chain as it ages is great preventative maintenance, which will prolong the life of the other more expensive parts of your bicycle. If you don’t repair or replace them, they will wear out, diminish the shifting quality, and damage other drivetrain components.
Fortunately, the process of repairing or replacing your bike chain does not take that long, and it is pretty inexpensive, but the impact that it has on your bike’s performance is huge. So, make sure to change your bike chain regularly.


